
ガイド/AutoCAD トラブルシューティング
AutoCAD Background Changed to White? Reset the Drawing Colors — Plus Grid On/Off (F7)
更新日: November 7, 2026
You open AutoCAD and the drawing area is white, or it has a grid you didn't ask for, or the grid you rely on has vanished. Nothing is broken and no drawing is changed: these are display settings of AutoCAD itself, and each one is a few clicks to put back.
This guide shows where the background color lives, how to restore the default or pick a color of your own, and how to switch the grid on and off. The screenshots are from AutoCAD 2026; the dialogs look the same in other recent releases. The background color is saved in your AutoCAD profile, not in the drawing, so a change you make applies to every drawing you open afterwards.
1. Open the Options dialog
Type OPTIONS on the command line and press Enter, or right-click an empty part of the drawing area and choose Options at the bottom of the menu.
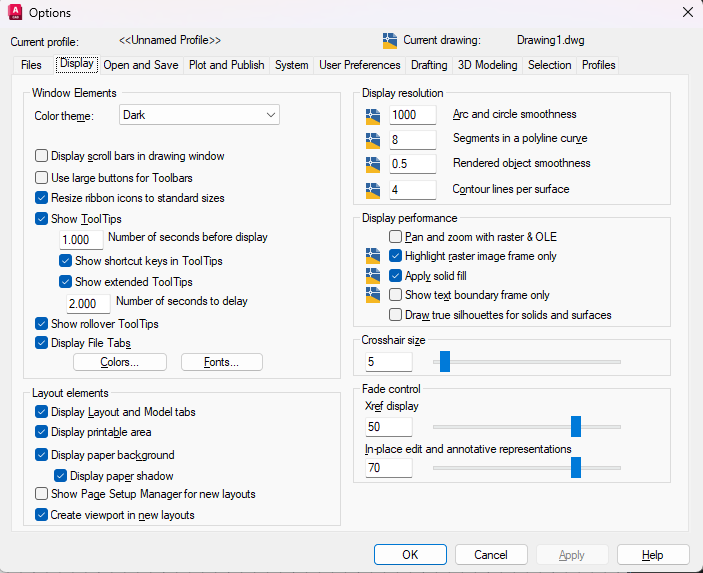
2. Go to the Display tab and click Colors
Click the Display tab. Under Window Elements, click the Colors button. Don't confuse it with the Color theme list just above it: that list sets the Dark or Light look of the ribbon, tabs and dialogs. The drawing area has its own color, and that is what the Colors button opens.
3. Select 2D model space and Uniform background
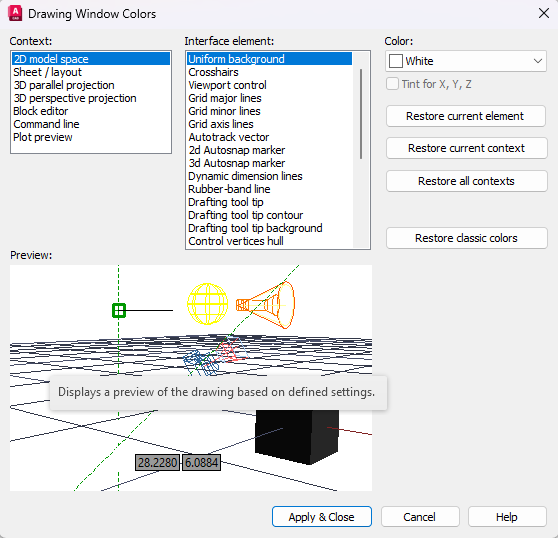
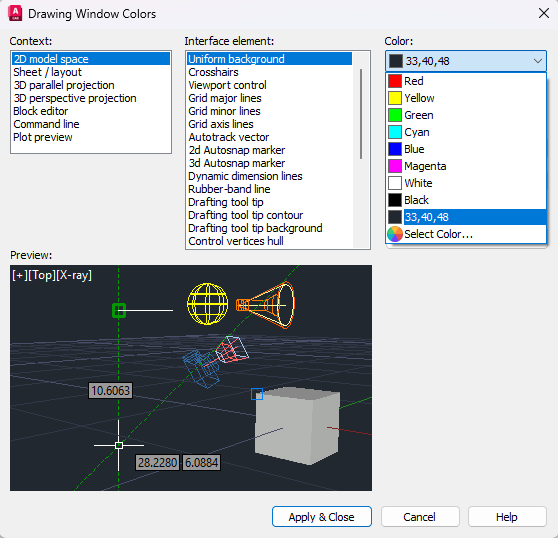
In the Drawing Window Colors dialog, pick 2D model space in the Context list, then Uniform background in the Interface element list. The Color box on the right shows what the drawing area uses now: White in our example.
The same dialog holds the colors of other parts of the drawing area, such as the crosshairs, the grid lines and the command line. Each element is changed the same way.
4. Restore the default color
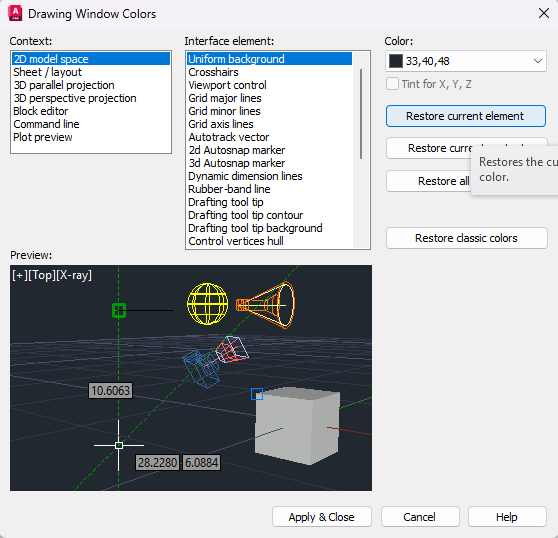
Click Restore current element. The tooltip says it restores the selected interface element to its default color. The Color box changes to 33,40,48, a dark blue-grey, and the preview turns dark.
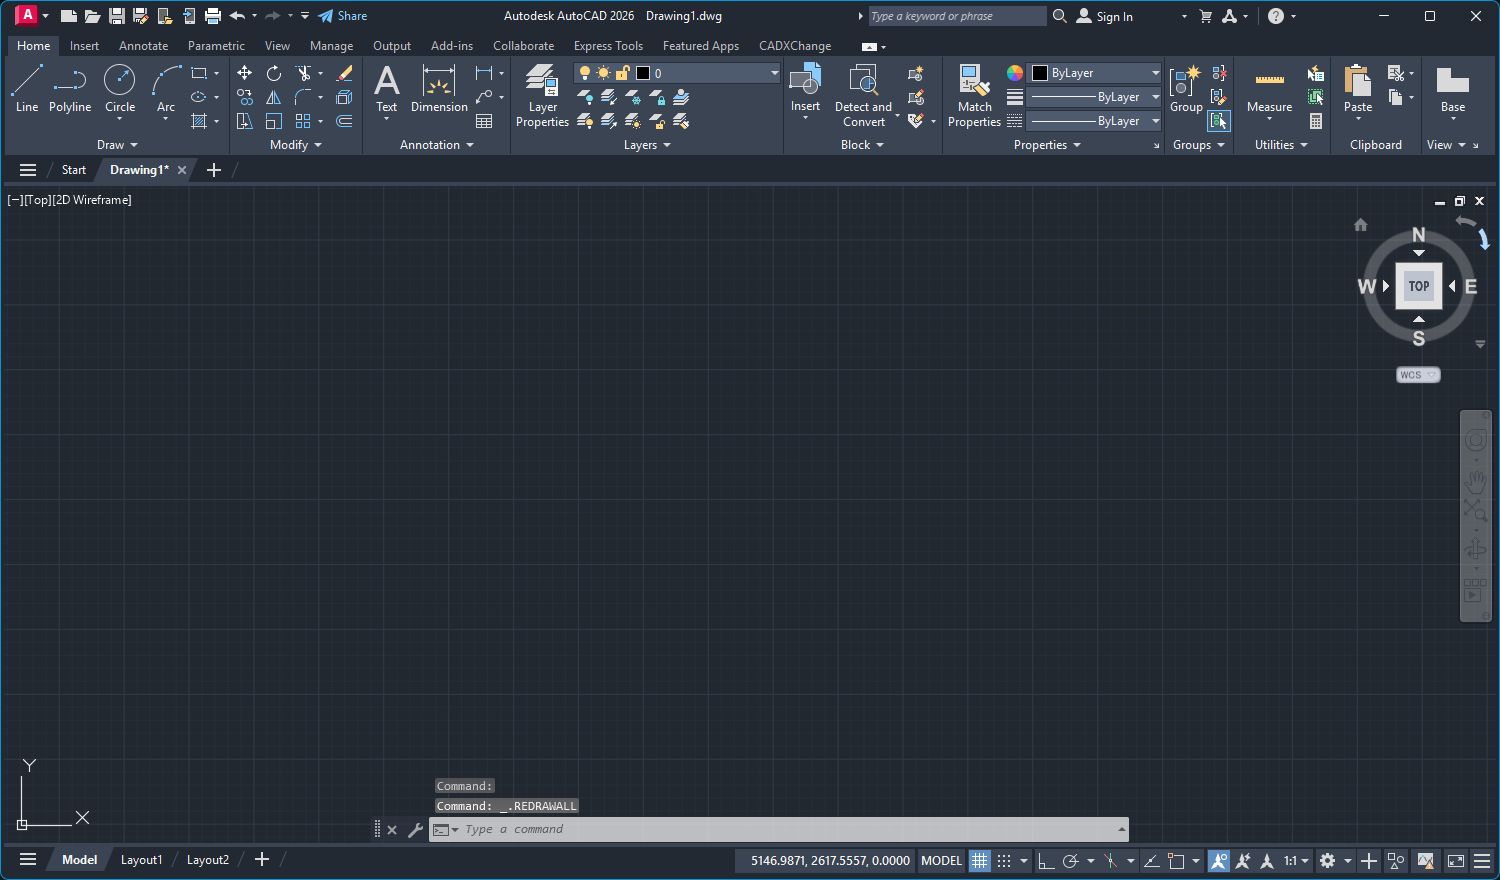
That is the default of AutoCAD 2026 in our test: not pure black. Your version's default is whatever this button gives you. Click Apply & Close, then OK in the Options dialog.
5. Or choose a color yourself
If you want black, or any other color, open the Color list instead of using the Restore button. It holds the standard colors, including White and Black, the default 33,40,48, and Select Color for any color you like.
Objects drawn in color 7 (white or black) switch automatically so that they stay visible on a light or a dark background, so a change of background does not make them disappear.
6. Layouts, 3D and the other contexts have their own colors
The Context list has separate entries for 2D model space, Sheet / layout, 3D parallel projection, 3D perspective projection, Block editor, Command line and Plot preview. Changing the model space background doesn't touch the others, so if a layout tab or the block editor still looks wrong, select that context and repeat the step.
Under the Restore current element button are Restore current context, which resets every element of the selected context, and Restore all contexts, which resets all of them. Restore classic colors is meant for AutoCAD's older, classic look. Use Restore all contexts when you simply want everything back to the defaults.
7. Turn the grid on or off
The grid is not part of the color settings. Click the Grid Display button on the status bar, or press F7. The button is highlighted while the grid is on. You can also type GRID, or set the GRIDMODE system variable to 1 for on or 0 for off.
GRIDMODE is saved with the drawing, so the grid can be on in one drawing and off in another. A new drawing from a standard template may open with the grid on, which is the usual reason a grid appears "on its own". In a layout, each viewport has its own setting.

8. The grid is on but you can't see it
If the Grid Display button is on and the drawing area is still empty, Autodesk lists a few causes. The grid spacing may be too small for the current zoom level, in which case AutoCAD can't draw it and the command line says the grid is too dense to display: zoom in, or enlarge the spacing in Drafting Settings (type DSETTINGS). The spacing can also be so large that only a few lines fall inside the view. Or the grid color is too close to the background: check the Grid major lines and Grid minor lines entries in the Drawing Window Colors dialog.
If none of these fits, open a new drawing and press F7 there. A grid that works in a new drawing but not in one particular file points to that file's own settings.
9. Check the result
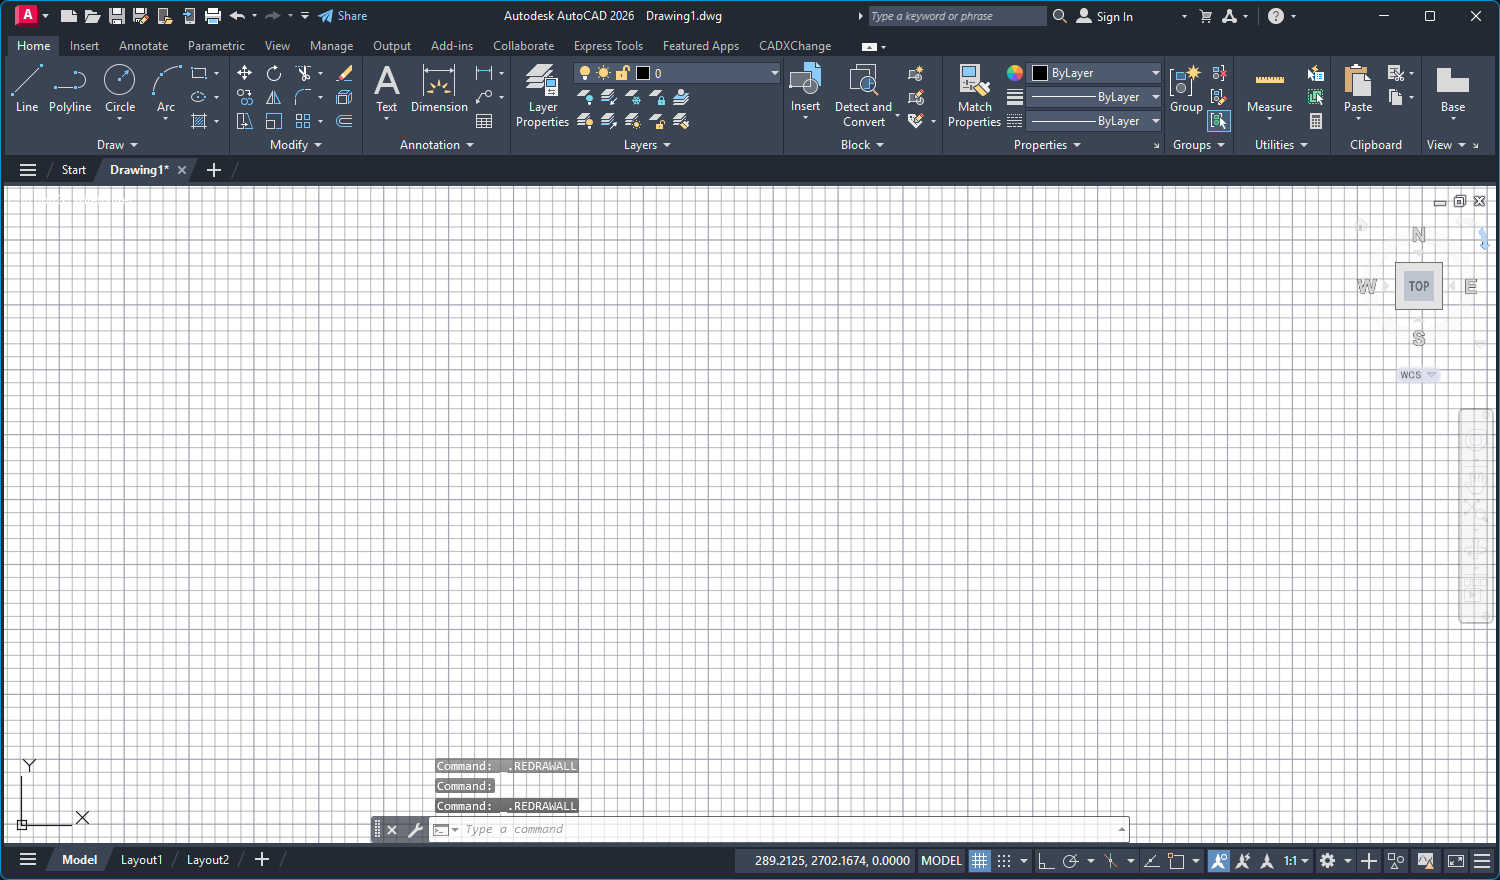
Back in the drawing, the area has the color you chose and the grid appears or disappears with F7. Here is the default look with the grid on.
The color is one setting in Options, Display, Colors: select 2D model space and Uniform background, then Restore current element or pick a color. The grid is a separate switch, F7. If someone else or a script keeps changing the background, check the Profiles tab in Options and any startup routines, because the color belongs to the profile.